Node-RED: a realistic application


A project student of mine has worked very hard trying to control my central heating using a Google calendar. I proposed this project as I'd previously tried to do this myself & realised that it wasn't an entirely trivial task!

I felt a little guilty when, despite her efforts, she didn't quite get it working. So, with my new found 'knowledge' of Node-RED etc I felt obliged to return to this and see what could be done.

I'd already built a couple of power switches that can be controlled from a MQTT broker, and I'd worked out exactly how to retro-fit something to my heating system without major surgery, so the only(!) remaining problem was getting some software to do the magic.


At left, above is an early MQTT power switch I built, while at right is a PCB for a general purpose network device having a 3A relay as well as a temperature & humidity sensor. I'm waiting for PCBs for this (see below) - the total cost of this device is around £5. I use Diptrace for PCBs.

The starting point: A node exists in Node-Red for handling Google apps. The documentation for this could be better but I (eventually!) got it to play nicely.

To cut a long story short, this is what the finished article looks like:


At top left is the Google calendar node, I have a google calendar set up called automation which I query here. This node is triggered every time a new event begins on the calendar. For the benefit of this demonstration I simply call the event switch on.

I soon realised that waiting for a calendar event was a rather tedious test method so I added the manual switch on node to help with debugging. The GCal2mqtt function node parses the incoming message and formats the output streams appropriately. As this is merely a 'proof of principle' it simply looks for the string switch on in the input, this particular node is handcrafted, and despite it only being a few lines of javascript took me an embarassingly long time to write!! :(

This is followed by a MQTT node (the one labelled rpi_mqtt) which publishes the message switch on to the topic msg on the MQTT broker. At the same time, it sends a text message (via Twilio) to my mobile phone in the red node labelled miphone. Further right is a MQTT subscribe node (labelled check_mqtt) which receives messages from the broker, primarily for debugging. The green boxes are entirely for debugging, they just send messages to the debug terminal.

In this particular example the Node-RED server & MQTT broker are both running on an old Raspberry Pi.


This is what it looks like on my phone and in the Node-Red debug terminal. The crap on my phone is just an earlier test showing some raw Google calendar data. The lower message is what it's meant to do!

At this point I've not connected an actual switch and in many respects there's little point! I know that the MQTT messages are published successfully and I know that I can subscribe to these messages from a very simple ESP8266 based device!

However, it seems a little unreasonable to call this 'a realistic example' without following through. The PCB above was put into action & the finished article looks like this:


How to wire it into my heating:

The image below shows how my central heating (and quite probably yours too) is wired:


Connecting the relay in place of (or in parallel with) the room thermostat does just what I want. The long rectangle in the middle of the diagram is a contact block tucked away in my airing cupboard which is a convenient place to make the connection. I could use the temperature sensor on the board to double as a thermostat but that wouldn't be clever as my airing cupboard is always warm! Because I'm using MQTT I can use a temperature sensor anywhere, I can even process data from several sensors...

However, it's the wrong time of the year to think of central heating! and I really do have a real application. I recently bought a 'patio greenhouse' rather like this:


I'm not especially green fingered but my daughter adores miniature cucumbers. You can't buy these in the shops, so I grow them from seed. The 'greenhouse' is excellent but it has a problem: while it keeps the seedlings warm they dry out in no time at all. Water lost through evaporation & transpiration condenses on the inside of the 'tent' and runs off. Leaving the thing for a few days in bright sunlight, without watering, would ruin the plants, so I need an irrigation system!

The photos below are of my irrigation system. It's basically the board shown above stuck to a battery pack. The relay controls a very small submersible pump (the white thing) which sits in a bucket of water.


Perhaps the most instructive aspect of this exercise was the matching of theory & practice. Previously I've described switches and endowed them with properties: on/off/toggle. 
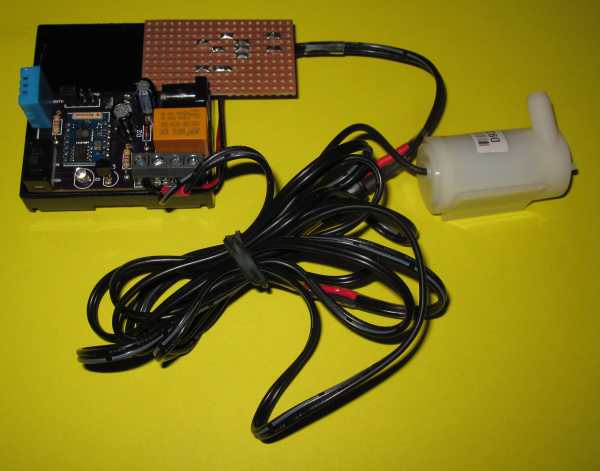
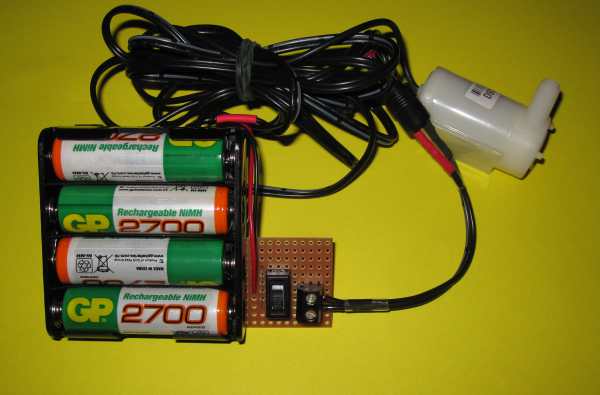
I don't have moisture sensors installed & all I really want is a blast of water for about 30 seconds in the evening. I could arrange a Node-RED flow to do this but I decided that another useful parameter for a switch should be pulse<nn> wherein the switch is on for <nn> seconds. The 
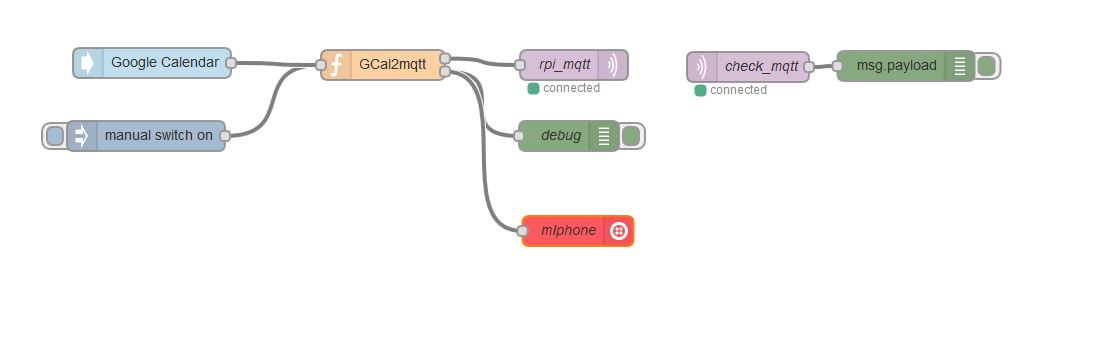
Node-RED flow looks like:


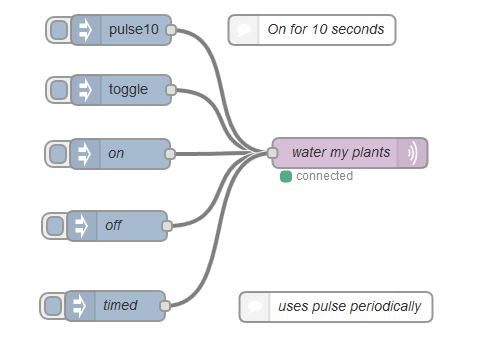
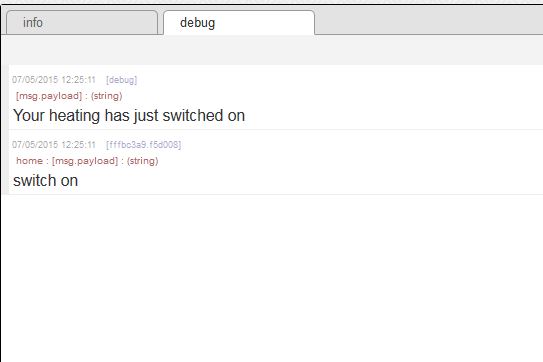
So, as well as on/off/toggle, I have two new inputs, the pulse button sends the message: pulse<nn> & the MQTT subscriber (my watering system) parses this message and switches the pump on for <nn> seconds.
The node marked timed does exactly the same thing at a specified date/time - this is a part of Node-RED.

The subscriber code which handles the messages is shown below:
  Serial.print("MQTT topic => ");
  Serial.print(pub.topic());
  Serial.print(", Payload => ");
  String Payload = pub.payload_string();
  Serial.println(Payload);
  if (Payload == "toggle")
  {
    Serial.println("Toggle the relay!!");    //this isn't very elegant code?
    switch_state ^= 1;  //toggle
  }
  if (Payload == "on")
  {
    Serial.println("Switch the relay on!!");
    switch_state = ON;
  }
  if (Payload == "off")
  {
    Serial.println("Switch the relay off!!");
    switch_state = OFF;
  }
  if (Payload.startsWith("pulse"))

  {
    String Seconds = Payload.substring(5);  //separate xxx from pulsexxx
    int seconds = Seconds.toInt();          //string to int
    Serial.print("Switch the relay on for ");
    Serial.print(seconds);
    Serial.println(" seconds");
    switch_state = ON;
    digitalWrite(RELAY, switch_state);
    delay(1000 * seconds);
    Serial.println("Switch the relay off!!");
    switch_state = OFF;
  }
  digitalWrite(RELAY, switch_state);

Conclusion


Most of the code above comprises debugging comments - it's actually only a few lines of useful stuff. I'm pleased to say that the whole thing works very well! I had to change the pump for something better but that's not the end of the world.

There's a bit of a learning curve here but it's quite breathtaking what can be achieved using Node-RED & MQTT. With the benefit of hindsight these exercises seem quite trivial but they weren't when I was building them! This is due in a very large part to my lack of expertise and appallingly bad javascript skills!!!

It's not at all obvious from the above that the nodes are generally configured from simple drop down boxes. The sole exception being the
GCal2mqtt node which looks like this:

if (msg.payload.indexOf('switch on') <0)
{
return null;
}

var fonemsg= {};
fonemsg.payload ="Your heating has just switched on";
var mqmsg={
topic: "msg",
payload: "switch on"
}
return [mqmsg,fonemsg]

This is a very unsophisticated example and was put together to demonstrate what can be done, and to satisfy my curiousity. It could be made a lot smarter! I could use the humidity sensor to test if watering is necessary etc etc. I think I have to put this one to bed now, my time is needed elsewhere :( I'll use this as a new final year project.

Ian Sexton